
Tips to make homemade baby food at home for your little baby. Easily make nutritious food for your baby at home. Read for all of the tips. This post will go over the supplies you will need to make baby food at home, 4 steps to make baby food, tips for making it easier to make homemade baby food, tips for storing and using your baby food, and my favorite resources.
Making baby food is really quite easy to do! There are entire blogs and large books published on the topic, so this will not be an inclusive post on how to make all baby foods, but rather a post that breaks it down into the basic steps so you can see how easy it is and consider venturing into the world of making baby food yourself.
When Brayden was a baby, I was reading about making babyfood in What to Expect the First Year. In it, they basically said that you really couldn’t match the sanitary conditions of baby food making companies. Because of that, I decided I wouldn’t try it. I didn’t want to get my baby sick!
Looking back, I really wish I hadn’t read that, or at least that there had been more encouragement in What to Expect the First Year to make baby food at home.
Once I had been doing this blog for a few months, Kaitlyn was coming up on one year old. I had noticed that there were a lot of moms out there who made their own baby food. I asked about it, and so many of you told me how easy it was. I decided when I had my next baby, I would try making baby food.
Let me tell you, it is easy! It is a lot easier than you would ever imagine.
Yes, it takes time. Yes, it takes more time to make babyfood than it does to buy babyfood (unless you live really far from the store…but you go to the store to buy food for your family already). So why would I do it when I had three kids? Here are my reasons (in no order):
- SANITATION: Wait, didn’t I just comment about what that book said? Didn’t it say your kitchen could never match the sanitary conditions of baby food manufacturers? Yes, I did. Things have changed. Or I have changed. I don’t necessarily believe that anymore. There have been so many recalls recently in the United States. When McKenna was a baby, large corporations recalled food because people are dying, and they then disclosed that there are dead rats in the plant. Tt made me skeptical and disillusioned. I no longer trusted these companies implicitly. Yes, I once did. I am the type to trust until my trust is broken, but then it is hard to earn my trust back. I definitely hope that babyfood manufacturers are more cautious and careful, but I don’t know that they are. I know what is in my kitchen. I have full control over it.
- HEALTH: My guess is that babyfood manufacturers make their food as soon as they can after picking it. That is my hope. However, I grow a garden, and I have food right in my backyard. What I don’t grow, my husband’s grandparents do. I am very fortunate in this way. I know what is done to my vegetables and fruits. I can also make the babyfood as soon after harvesting as possible. Fruits and veggies lose nutrients as they are harvested, so the sooner they are prepared, the better. This is a benefit I have and one compelling reason for me to make babyfood myself.
- MONEY: Along the same lines, money! Since we grow a garden and can get so much for free, it seems silly for me not to make it. It is free babyfood! If you don’t grow a garden, it is still a lot less expensive (in most cases) to make it yourself if you buy it from the store. There are times of year when certain things are quite expensive (like fruit around here in the winter months).
- CHALLENGE: Okay, I admit it, I like a challenge. It was something I hadn’t done before and I wanted to see if I could.
- REWARD: I find it very rewarding to make the food from scratch. I actually got a bit giddy inside when I made food for my babies.
- TASTE: I find it tastes good enough I would eat it, which I can’t really say for all store-bought baby food.
Now, I find making babyfood to be easy. Most people seem to agree, though some say it is hard. Yaron (author of Super Baby Food) says she thinks it is easy and she is no cook.
I do cook. I make most things from scratch. I even grind my own wheat to make bread…so I can’t say it is easy from a non-cooker point of view, but others have.
Let me point out that I made baby food when I had three children ages 4, 2, and 6 months old. At the same time, I was packing my house, moving, and unpacking my house. I can only imagine how much easier it would have been if I had done with while Brayden was my lone child and we weren’t moving.
It really isn’t any harder than preparing any fruits and vegetables for your family.
For anyone interested in making babyfood, I encourage you to try.
I also want to point out that for me, making babyfood was not an all or nothing situation. McKenna did get store-bought babyfood at times. I liked to keep it on hand for traveling.
I also have her store-bought before I can make it. I like to make it in masses, and I made it as it has was in season. Thankfully, for me, not everything is in season at the same moment.
She had store-bought prunes, rice cereal, and oatmeal. I did also make homemade prunes at times, too.
So my point is, you can make some baby food at home and feed some store bought baby food.
Post Contents
BABY FOOD MAKING SUPPLIES
You really don’t need much for making babyfood, and you probably have just about everything you will need already.
- Knife
- Cutting board
- Peeler
- Possibly a pan for cooking if you are making things like peaches before baby can have them raw
- Cookie sheet/baking pan (if you want to bake things in the oven, like squash)
- A way to mash or puree the food
- Spoon
- Bowl
- Oven
- Freezer
- Ice cube trays
- Wax paper or cling wrap
Okay…there might be something missing from the list, but so far, you can see that it is really basic. There are a couple of things you might not have:
- Blender or Food Processor
 . We have a Cuisinart, but I actually mostly just use at little food processor that looks similar to this: Continental CE22361 Mini Chopper. If you are looking for a great blender, I love our Blendtec Blender.
 - This is not a necessity, but I find a baby food mill invaluable. It is so easy to use. It strains the food. I use this more than anything else.
 . We have a Cuisinart, but I actually mostly just use at little food processor that looks
 . It is so easy to use. It strains the food. I use this more than anything else.
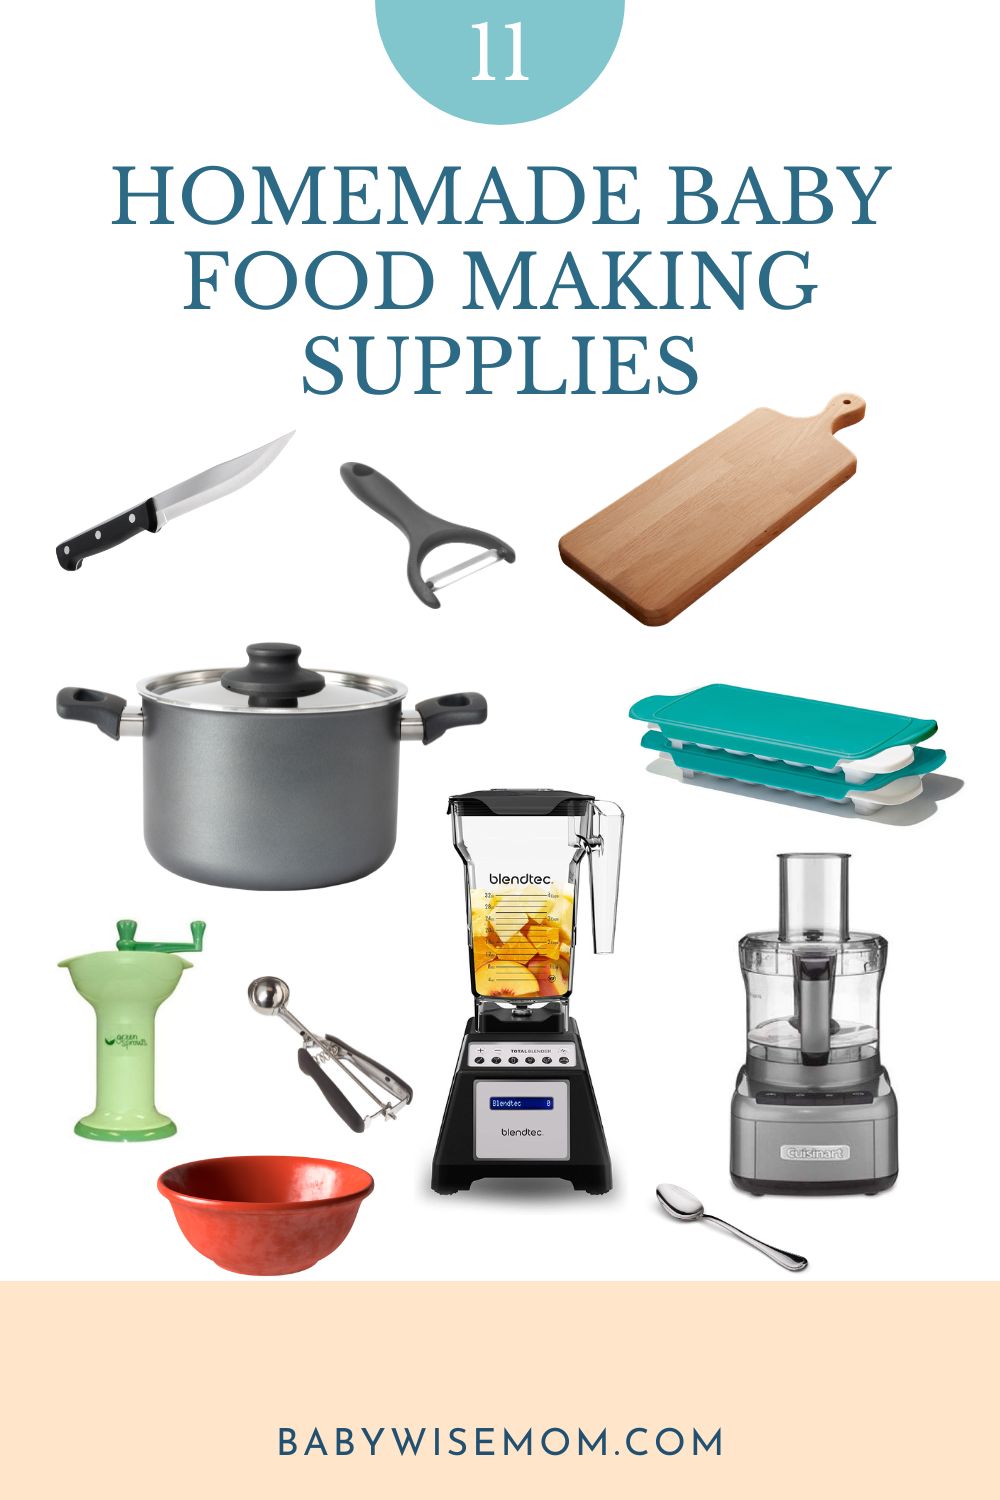
HOW TO MAKE HOMEMADE BABY FOOD
Here are the basic steps in making any food.
STEP ONE: COOK THE FOOD IF NEEDED
For any vegetable, you will need to cook it. For younger babies, fruits will need to be cooked until six months old. After that age, you don’t necessarily need to cook a fruit.
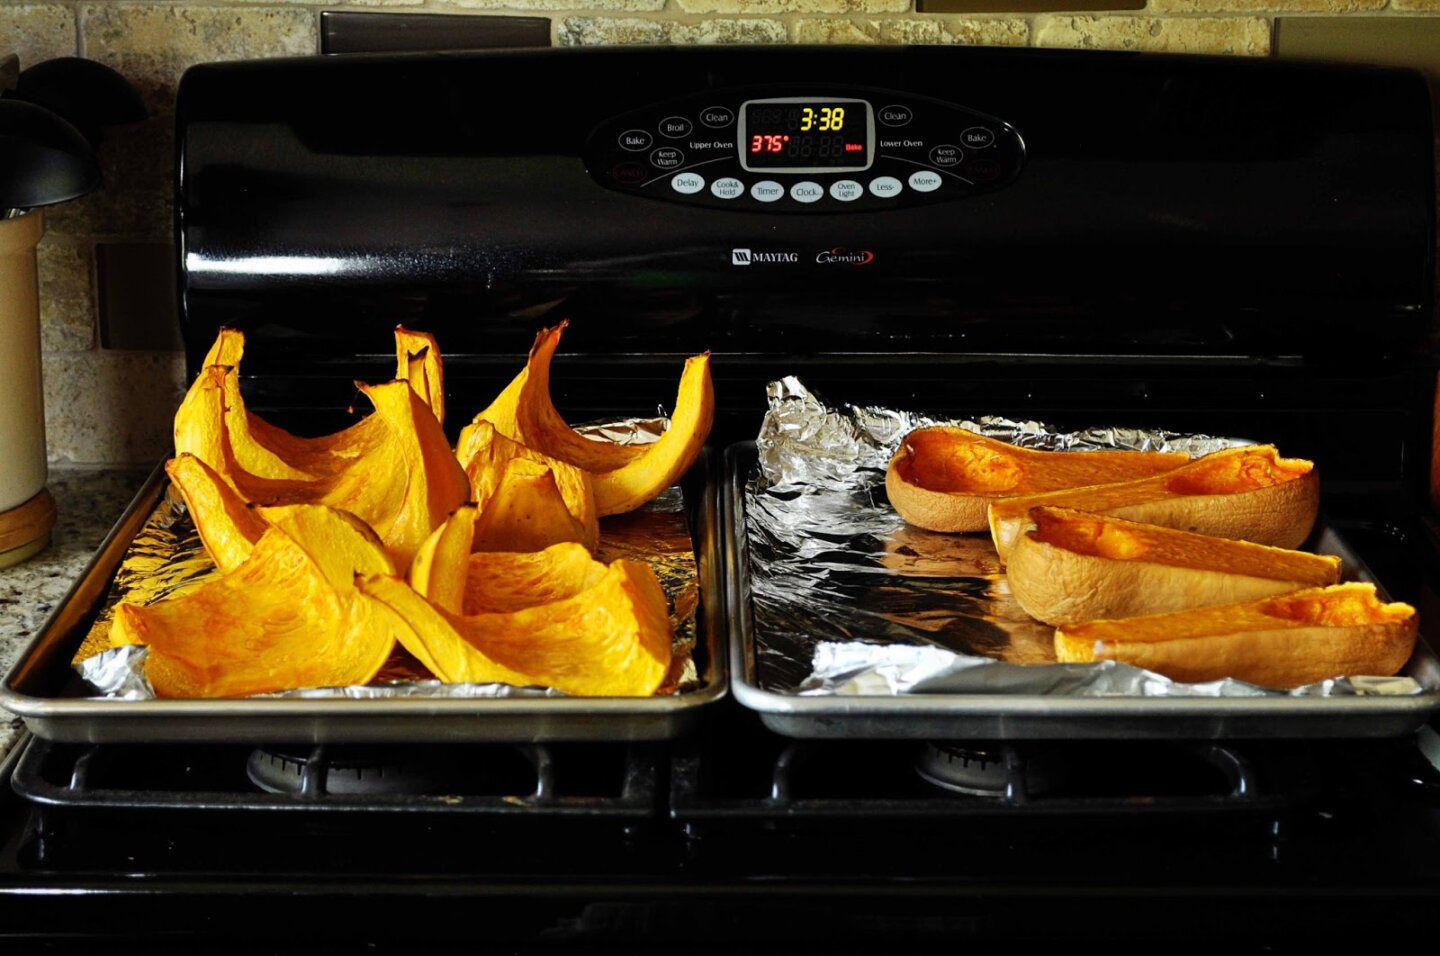
You can cook the food any way you like the food cooked. My opinion is that veggies taste better baked than boiled or microwaved, so I bake my food for my babies.
For carrots, I cook them in the slowcooker.
Whatever method you choose, you want the food to be very soft when done, so steaming might not be the best method for baby food for certain foods–I guess unless you steam it longer than I would steam for myself. I like my steamed veggies crisp.
You can easily search recipes on the nice worldwide web for how to bake, microwave, boil, or slow-cook vegetables.
STEP TWO: REMOVE SKINS
If you microwave or boil your vegetables, you will remove or peel the skins before you cook them.
Sweet potatoes will literally just drop out of the skins when they are baked. I just take them out of the oven and let them cool enough that I can work with them without burning my fingers. I then cut them in half and let them cool more if I need to. I then hold it over my Cuisinart and just let the flesh drop out.
Cooking Tip: For cooking sweet potatoes, put a drip pan or a cookie sheet on the rack under the sweet potatoes. You cook them on the rack, but the juices will start to drip out at the end. With a drip pan or cookie sheet, you can just clean that up instead of having to clean your whole oven.

For squash, I use a cookie scoop as pictured above. I scoop the squash out and drop it into my Cuisinart. Here is a picture of baked squash and butternut squash.
If you are not cooking your fruits, you might want to blanch the fruit to aid in skin removal. Blanching sounds ominous before you try it. Google ways to blanch for videos or tutorials.
Basically, you have a pot of boiling water on the stove and a sink full of ice cold water. You put your food in the boiling water for usually 1-2 minutes, then remove and put it in the ice cold water.
The skin will then easily slip off (if the fruit was ripe; under-ripe fruit doesn’t blanch so well).
Take note that not all fruits can be blanched. For example, you need to peel apples, not blanch them.
You can also use frozen fruits for your baby. This is nice for things like mango. You can buy cubed mango. Let it defrost, then mash it and feed it fresh. You do not want to re-freeze foods, so if using frozen foods, make just enough for a day or two.
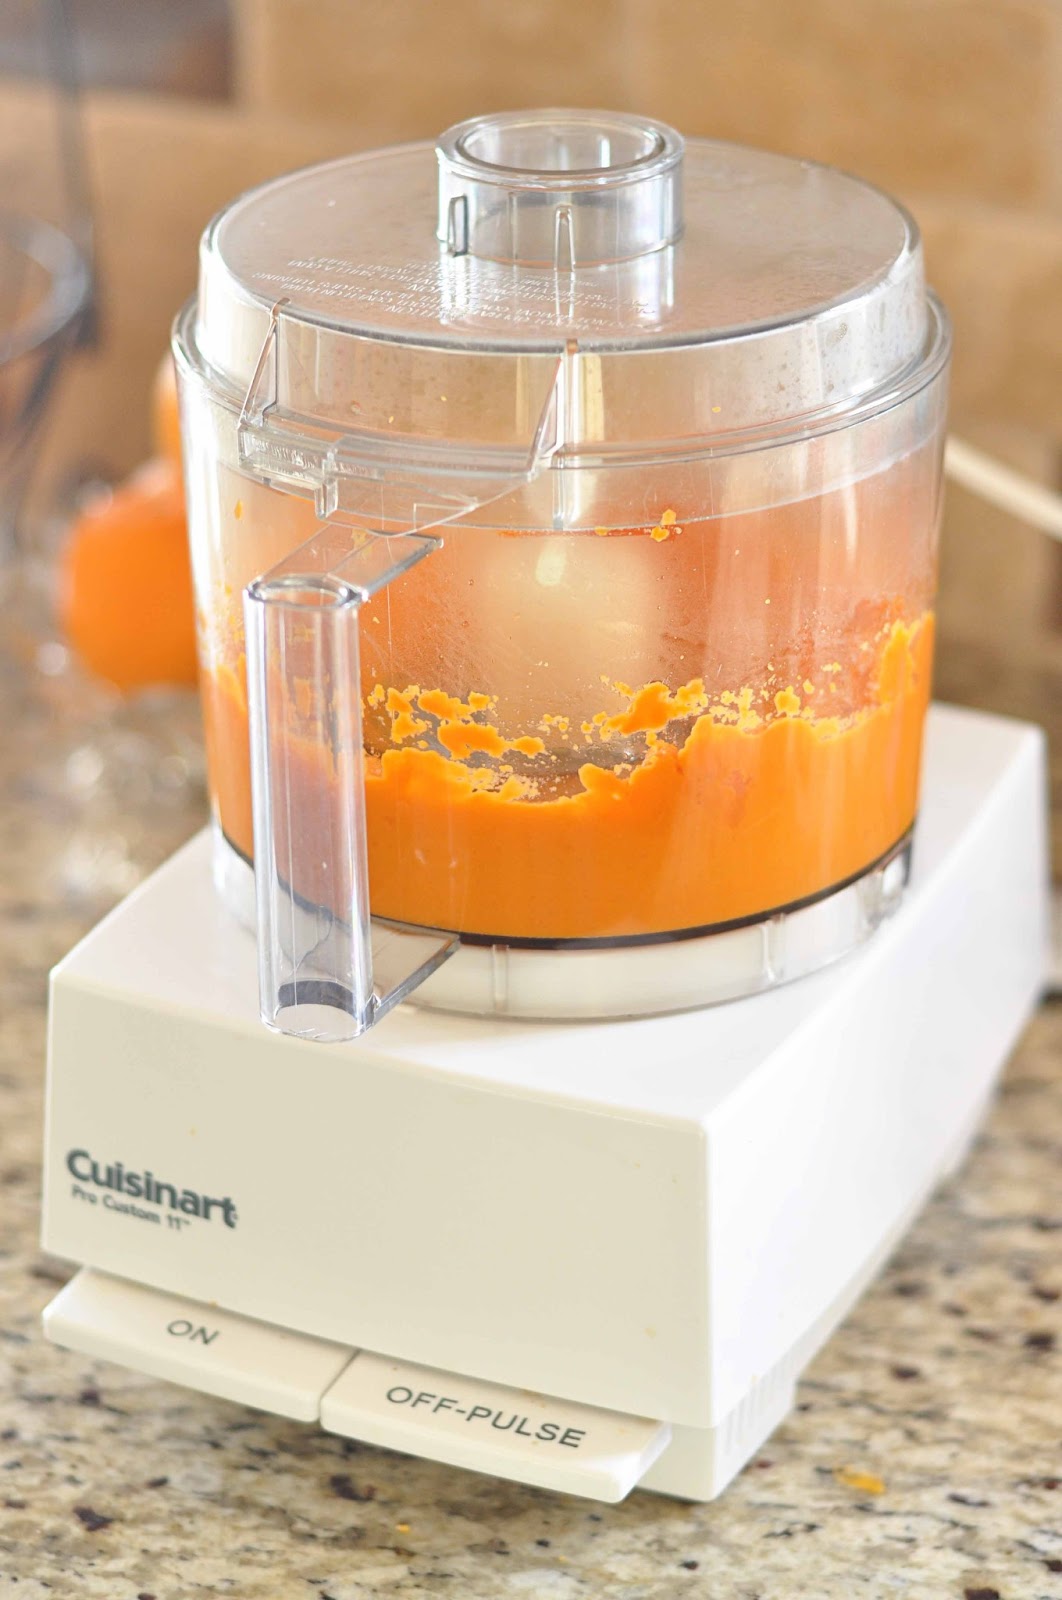
STEP THREE: PUREE FOOD
One way I puree the food is in my Cuisinart Food Processor. I put any food I have in large quantities in this. For example, I do squash, sweet potatoes, carrots, peas, prunes, and green beans in this.
Another way to puree the food is with a Baby Food Mill. I use this for my bananas and avocados. You could use it for strawberries if you wanted to puree them.
I will also use it to quickly puree some pears or peaches that I have preserved in mason jars. You could do smaller portions of the other foods in this, too. So if you made squash for the whole family, but wanted to puree some for baby for dinner that day, you could do just one portion in this.
I also use a Baby Food Mill for squishing up my bananas for banana bread. It is an inexpensive baby tool and I find it useful beyond baby food.
An immersion blender is also a great option for pureeing food.
You will want to try different amounts of pureeing to see what texture is best for your baby. Some will like it chunkier and others will prefer it to be smoother.
Typically younger babies like or need a smoother texture than older babies. Store-bought baby food gets chunkier as you go up in the “stages”. For a super smooth texture, you might also use a strainer.
You can also use the old-fashioned method of a fork to smash and mash things up. A blender works great as does a potato smasher.
If the puree is too thick, use some water, breast milk, or formula to thin it.
If you are making babyfood for 2-3 months (or more), my tip is to not thin it much when you make it initially. I discovered this accidentally. I made some food that I just didn’t add much water to (carrots). It was smooth, but thick. When she was younger, I would add water to get it as thin as she needed it. As she got older, however, I would add less and less water until I didn’t add any.
So keep it thick when freezing it and thin it as much as you need at the time.
If you have expressed breast milk, you can add that to the mixture to thin it. If not, you can use formula. If you do not have that, water works, too. Formula or breast milk are great options if you are worried about how many liquids your baby is taking in each day.
As they grow, their consistency needs change. If you make it thicker, you can always add water when you serve it, but you can’t take the water out. So, if you are making a large batch, try not adding much water so the food can “grow” with your baby.
Did you know that you can make homemade yogurt? See my Easy Homemade Yogurt Recipe for instructions on how to do this.
Note: do not mix the foods before you freeze them unless your baby already successfully eats the mixed foods. You want to start out with one ingredient puree so you can watch for allergies. You also do not want to mix foods that your baby does not like together and have a bunch of wasted food.
You can mix small portions of the foods once they are defrosted.
STEP FOUR: FREEZE THE FOOD
The food will last for a couple of days in the refrigerator, so I save a couple of portions for baby in the fridge.
The rest goes into ice cube trays. I scoop it using a spoon or my cookie scooper. I use traditional trays and the trays with lids. The lids help keep the food fresh and you can stack the trays easily.
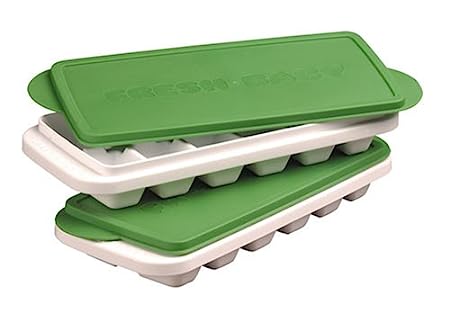
Once it has frozen (usually about 12 hours) you can move it into freezer bags. I write the month and year I made it on the bag with a permanent marker. Then each morning, I get out any cubes I need for the day and put them into baby bowls with lids.
If you need it thicker when it is time to eat the food, you can add cereal to the puree. My go-to was always oatmeal.
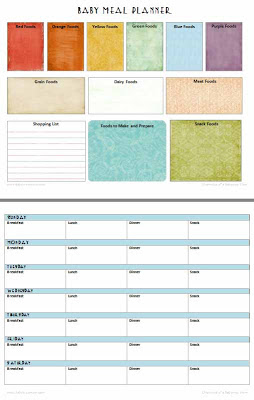
See! Four basic steps to making your own pureed foods. I make enough at once that I only have to do it every few months. For keeping track of what you have introduced and what you plan to introduce, check out my free printable Baby Meal Planner.
MAKING BABY FOOD TIPS
Here are my tips for making the process easier on yourself:
- MAKE IN BULK: I make it all in bulk. It takes about the same amount of time to make one ice cube tray of food as it does one, so it saves more time if you make more at a time.
- MAKE ONLY WHAT YOU NEED: While you want to make in bulk, the food only lasts so long. Try your best to calculate about how much your baby will eat before it goes bad and make that much. For example, peaches last two months in the freezer. You don’t want to make 6 months worth at one time and have to throw 4 months worth away.
- MAKE WHAT YOU CAN STORE: You will find baby food quickly starts to take up a lot of space in your freezer. We already owned two refrigerator/freezer combos, and both freezers were stuffed full when I started to make babyfood. Make what you can store in your freezer space. If you want a rounded menu (green veggies, orange veggies, and fruits), you won’t be able to make so much at one time and fit it in one freezer.
- INVOLVE THE FAMILY: Making babyfood alone isn’t hard, but it does take time. If you can involve another member of the family, it can shave a lot of time off. I even had 4 year old Brayden help me (he loved to help in the kitchen). I had him twist the food mill while I pushed it down. Doing it a few times by yourself is no problem, but 20 times later, your hands start to hurt! It really was a big help to have Brayden help me.

STORING BABY FOOD TIPS
- FREEZER BAGS: I put my baby food into freezer bags once it was all frozen. Yaron suggests using small freezer bags. I have found this to be a good idea. When you open and close over and over, the food doesn’t stay as fresh, so the smaller the bag, the less food to go through while trying to keep it fresh.
- LABEL: Be sure to label it. Peaches and squash look a lot alike when frozen.
- GROUP IT: I put my food in small freezer bags, but then put one of each bag that I was using into a gallon-sized freezer bag. This helped in a few ways. One is that it was extra protection for the food being stored. Another is that it was easy to find the food I need each morning when I was getting the food out. Before I started doing this, I would search through the freezer trying to find a particular bag. You might put things back in the same spot, but if more than one person lives in your house who uses the freezer, he (or she) might not.
USING BABY FOOD TIPS
- GET IT OUT: Each morning, I got out what my baby would eat for the entire day and put it in bowls with lids on them. I then put the bowls in the refrigerator so the food can start to defrost.
- ADD SPICES: You can add spices to the foods. It is wise to make the foods without spices and add them to individual servings in case your baby is not a fan of the spice. Do not feel like you need to add spices or salt. Many babies will happily eat plain fruits and veggies.
RESOURCES
These are the resources I liked best.
- Wholesome Babyfood.com: This is a great site, and is really the only resource you would need. Something nice about a website is that it is dynamic and they keep current recipes on the homepage. It offers lots of different recipes for each food. If you check out the avocado section, you will see several different ways to prepare avocado for your baby. This isn’t really necessary; baby is fine with the same old thing over and over, but you might find it fun.
- Super Baby Food: This is my favorite resource. I am more of a book person than a website person. I like to have books to look through. I keep this book in my kitchen with my recipe books. This book is worth it even just for the section on how to choose, store, prep, make, and keep all fruits and veggies. I use it for the whole family! If you prefer books, I would get this. This also has many baby food recipes, so it is a great resource!
- Baby Food Recipe Book: There are a lot of options on Amazon for recipe books. If you like hard copy books, be sure to look through and find one that you would like.
 : This is my favorite resource. I am more of a book person than a website person. I like to have books to look through. I keep this book in my kitchen with my recipe books. This book is worth it even just for the section on how to choose, store, prep, make, and keep all fruits and veggies. I use it for the whole family! If you prefer books, I would get this. This also has many baby food recipes, so it is a great resource!
DISCLAIMER
If you do not feed your baby homemade baby food, please do not take this post as an attack at you. You do not now need to fret or worry about this. I only intend this to be encouraging for anyone out there who wants to try, not condemnation for those who don’t want to try. My oldest two babies did not have homemade baby food and are doing fine today.
RELATED BLOG POSTS
- Easy Tips for Introducing Solids to Your Baby
- How To Introduce Solid Foods to Your Baby
- Baby Meal Planner {Free Printable}
- Tips for Introducing Solids to Your Baby “Randomly”
Reader Tips
Lommori Family said: I make my own babyfood too. I love using the cuisinart stick blender, works just as good as a food processor and so much easier to clean. I also use it to make my toddlers smoothies, blend soup still in the pot, whisk homemade salad dressins, etc. I also use tovolo perfect cube ice trays. They hold exactly one oz of food which is great for keeping track if how much LO eats, plus they are perfect cubes which stacks great and saves space. I got them on amazon. They are silicone so it is soooo much easier to get the frozen cubes out of the tray!
Danielle said: I couldn’t believe how easy it was to make babyfood when I was in that stage. I also loved the Wholesomebabyfood blog. I learned so much about different fruits and veggies I’d never worked with before too. I definitely think it was a money saver for most foods, and I really liked knowing how fresh the foods were too.
Bella Wilson said: Great post indeed! Being a working lady, I hardly get time to prepare baby food for my little boy so I end up buying it at the store. I often use vegetable crushing machine for making the purees of fruits and vegetables. Sometimes, I also purchase ready-made baby food packets as these baby food are as nutritious and healthy as the homemade food. This time, I tried Cow & Gate baby food packets which I purchased from Feeding for Life. These baby foods are full of nutritious and give a balanced diet to my baby.
This post first appeared on this blog in October 2009.