
Learn why you should use VAKT and how exactly to do so to teach children new concepts, from letters to numbers.
Here is another post from our literacy specialist, Sue. I found this post very interesting and helpful! I am sure you will love it, too!
~~~~~~~~~~~~~~~~~~~~~~~~~~~~~~~~~~~~~~~~~~~~~~~~~~~~
Whether you are teaching children at home for fun or as part of a homeschool curriculum, I highly recommend you use VAKT.
VAKT stands for visual, auditory, kinesthetic, and tactile.
Visual is something we can see. For instance, we can see a visual image of the letter A written on a piece of paper.
Auditory is something we can hear. An example of something auditory is when we hear the sound that A produces when we say /a/ as in apple.
Kinesthetic is anything that requires movement. Kinesthetic can be jumping jacks, turning the page of a book, or writing the letter A on paper.
Tactile is something we feel. We can feel with our fingers rough sandpaper or we can feel the texture of the sidewalk as we write on it with sidewalk chalk.
>>>Read: How To Do A Preschool Homeschool
Post Contents
Introduce Concepts Using VAKT
When we introduce a new concept, letter sound, math number or fact, or sight word, it is best to do so using the VAKT method.
The reason for this is that children will commit the new thing they are learning to their long-term memory fast and more efficiently if it is presented to them using several sensory avenues- visual, auditory, kinesthetic, and tactile.
Research has also shown that using a multisensory method with children who
have learning disorders will help develop literacy skills in reading, spelling, and writing more efficiently.
How To Use VAKT at Home
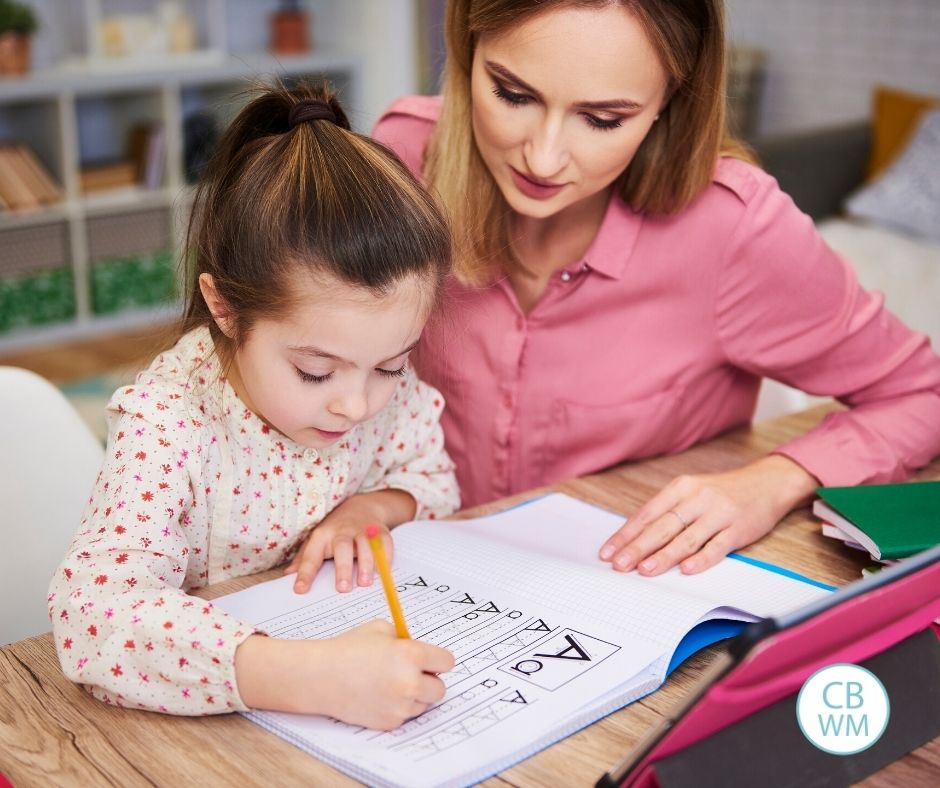
So how can you use the VAKT method with your child at home? I will give an example of what VAKT looks like when are you are teaching phonics.
You will want to use a method called Model, Trace, Copy, Memory.
You will write the letter large. It is best to do this on a large piece of paper, chalkboard, or white board.
MODEL: As your write the letter (visual) large, you will also say the sound of the letter at the same time (auditory). This is known as SOS, simultaneous oral sounding.
When I say large, what I mean is, large enough that you have to actively use your shoulder (rotator cuff) to move your arm up and down as you write the letter.
This action is a gross motor activity.
I would say that if you wrote the letter at least two feet high, that should suffice. But don’t feel limited to only writing something two feet high, feel free to write it even larger if you want. Get a large drawing pad or butcher block paper for this activity if you want to use paper.
Otherwise, chalkboard and white board do really well too.
TRACE: Have your child copy over top of your letter (kinesthetic & visual) while saying the sound at the same time (auditory), SOS. You may have to guide your child’s hand large.
COPY: During this step, your child has to write the letter on his or her own without tracing. You may still leave the model and trace letter visible for your child to see.
The child is to use SOS while writing and saying the letter orally (visual, auditory, kinesthetic, tactile).
If your child incorrectly writes the letter or produces the sound incorrectly, return to the model and trace steps. Continue to keep return to these steps until your child can produce the sound and written letter on his or her properly.
MEMORY: Cover or hide the letter from the model, trace, and copy step.
Your child is asked to write the letter large from his own memory. He or she must use SOS while writing the letter (visual, auditory, kinesthetic, tactile). If your child does not say the correct phonics sound or write the correct letter form, return to the model/ trace step again.
This Develops Handwriting Skills
The neat thing about this method of teaching phonics is that you are also addressing handwriting skills at the same time.
Young children under the age of 5 may do better with using writing utensils such as their finger, paintbrushes, chunky sidewalk chalk, and chunk crayons.
Formal pencil holding and grip is usually not taught until 4-5 years of age.
Be creative. You don’t have to just teach on paper, white boards, or chalk boards.
Think of doing it in the sand, on the sidewalk, with paint brushes, in the bathtub, in clay, or any medium you can think of.
Flash Light writing can be fun too.
Try doing some SOS on a wall in the dark. Kids like variety, but don’t we all. The more modalities and mediums you use, the more senses you will utile and help to commit the skill to memory.
But just remember, please write it LARGE!!!
Conclusion
The same can be done with learning the numbers and sight words. I have also used this method to teach basic math facts of addition, subtraction, multiplication, and division. The best part of this method is, it works!
Related Posts
- How to Teach Early Literacy Concepts About Print/Books
- Early Literacy and Phonemic Awareness
- The Benefits of Audio Books for Literacy Development
- Why The Read-Aloud Handbook is a Must-Read
- Phonics: To “B” or not to “Bu” that is the question!
This is totally interesting! How does sign language fit into the VAKT method? My son is just 17 months old, so we're not learning letters yet. But he is starting to say a lot of words now and often he will more readily try to speak the words he knows signs for. I wonder if he has a stronger grasp of those words/concepts because he's learned them through auditory and kinetic learning.
I am not sure Allie. I will make sure Sue sees this and see what she has to say.
Allie, your son is most likely speaking the words he has learned in sign language because he has had more exposure to these words. They are common words that he uses every day. You have set him up for success with these words because he knows how to already use them in his conversation and exchange with you through sign language. For new learning to occur, in any area, whether it be speech, phonics, or math, some "pre-teaching" needs to occur. During this period we model how to use the new skill and we provide back ground knowledge so the child can understand how to use that skill in context. Learning takes hold much more efficiently if taught using as many different resources or senses possible. So, if you do sign language you are priming your son with more sensory information and setting him up to be more successful to use his oral language correctly. For instance, let's say you have never baked a cake before. Do you think it would be easy to bake a cake on your own if you have never seen someone back a cake? Probably not. You would have no clue what measuring cup to use, how to beat the batter, how to crack the egg. Now let's take it a step father. Let's say you've seen someone bake a cake before, but you never participated in helping to make the cake. Do you think you could bake the cake on your own? You could probably do an okay job, but it might be challenging. And imagine this- Let's say you have seen someone bake a cake and you pretend to bake a cake on your own using your baking set toys. Do you think after all the imaginative play you could bake a real cake on your own? I bet you could. You had a chance to try out your skills "pretending" and also learned important skills necessary for play. I give this long example, because sign language is sort of like that. You are giving your child an opportunity to practice language long before he or she is ready to use language orally (or long before you were ready to bake the cake on your own). You tap into your child's strengths, which are movement (kinestetic), hearing (auditory), seeing (visual), long before speaking is developed. That is why words he has learning through sign are easier for him to use in oral language.I hope that is clear. If not, please leave a comment and I will try to respond with more.